Vite(ヴィート)の開発環境構築について学びました。
自分用にメモを残しておきます。
GitHubに晒しました↓

この環境を使ってみて修正点見つけたら適宜修正していきます。
開発準備
Macでターミナルを起動します。
起動時はホームディレクトリ(/Users/ユーザ名)のため、cd(change directory)コマンドでDesktopに移動します↓
cd ~/Desktop現在作業中ディレクトリは、pwd(print working directory)コマンドで確認できます↓
pwd Viteプロジェクト作成
Viteの公式サイトを見ながら作成していきます↓

プロジェクト初期化
下記コマンドでプロジェクトを初期化します↓
npm create vite@latestnpm createはnpm initのエイリアスでpackage.json を作成します。
vite@latestは「最新バージョン(2023年2月7日時点で4.1)のViteをインストールする」という意味です。
コマンドを実行して、質問に答えながらプロジェクトを作成していきます。
続行の意思確認
npm create vite@latestを実行すると、「create-vite@latestをインストールしてください、このまま続けますか?」と訊かれるので、キーボードのyを入力してEnterを押してください↓
Need to install the following packages:
create-vite@latest
Ok to proceed? (y)
プロジェクト名決める
「プロジェクトの名前どうしますか?」と訊かれるので適当に名前をつけます。デフォルトではvite-projectになります↓
Project name: › vite-projectフレームワーク決める
「フレームワークどうしますか?」と訊かれるので好きなフレームワークを選択します。
今回はVanila(素のJavaScript)を選択します。
? Select a framework: › - Use arrow-keys. Return to submit.
❯   Vanilla
    Vue
    React
    Preact
    Lit
    Svelte
    Others
JSまたはTS
次に、「JavaScriptかTypeScriptどっちにする?」と訊かれるので、好きな方を選択します。
今回はJavaScriptを選択します↓
? Select a variant: › - Use arrow-keys. Return to submit.
❯ JavaScript
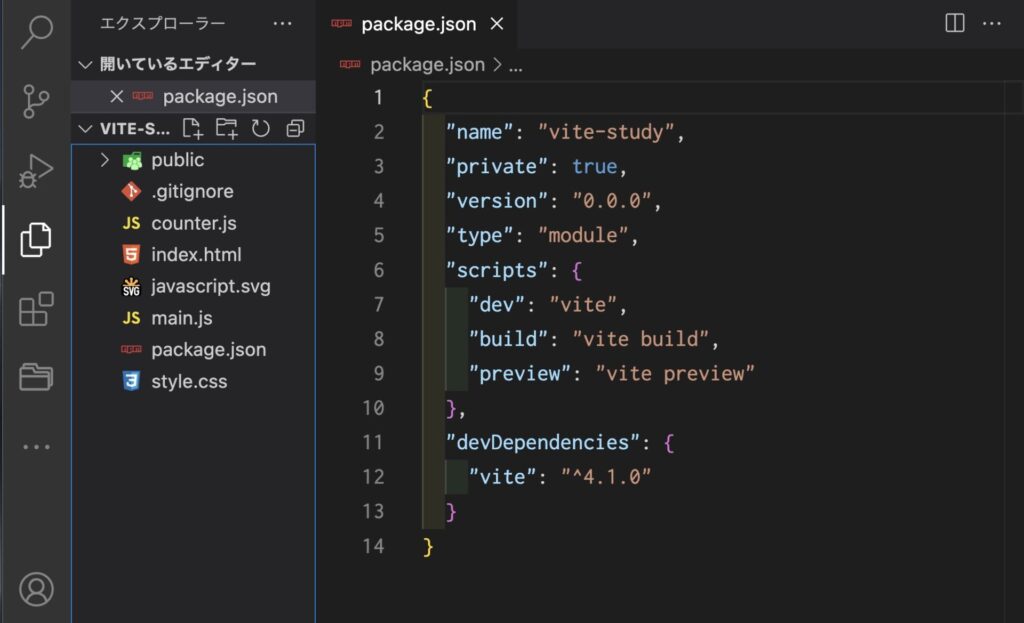
TypeScript選択後、デスクトップにViteプロジェクトのフォルダが作成されます。
VSCodeで開くと下記画像のような構造になっていることがわかります↓
パッケージインストール
npm install を実行して、viteのパッケージをインストールします↓
npm installインストールが完了すると、下記画像のようにnode_modules/とpackage-lock.jsonファイルが追加されます↓
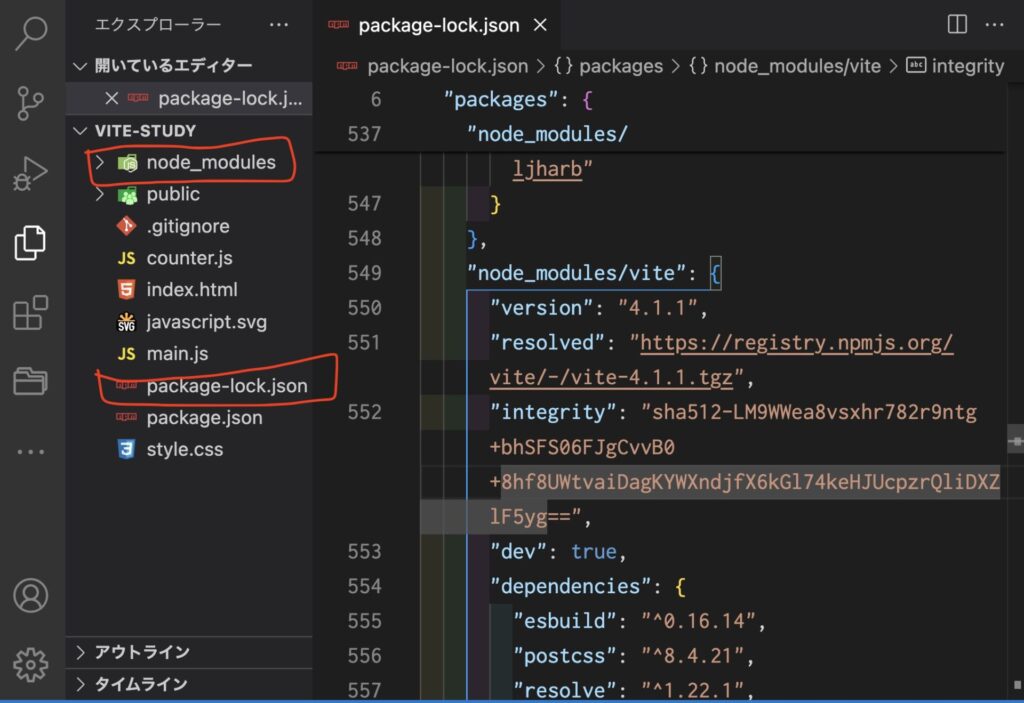
node_modulesついて↓
package-lock.jsonについて↓

この状態でnpm run devを実行すると、開発用サーバが立ち上がります↓
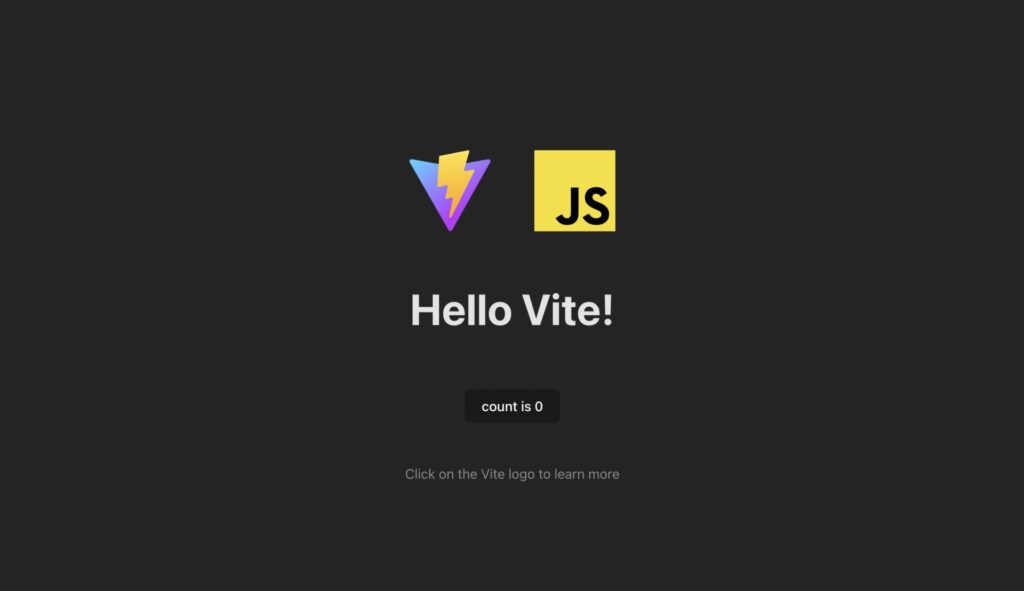
開発用サーバが立ち上がるスピードがWebpackよりだいぶ速くて感動しました✨
基本設定
VSCodeの設定
プロジェクト直下に.vscodeフォルダを作成し、その中にVSCode設定用のsetting.jsonを作成します。そして、setting.jsonにお好みで設定を追加します↓
{
  "editor.formatOnSave": true,
  "css.validate": false,
  "scss.validate": false,
  "editor.defaultFormatter": "esbenp.prettier-vscode",
  "editor.codeActionsOnSave": {V
    "source.fixAll.eslint": true,
    "source.fixAll.stylelint": true,
    "source.fixAll": true
  }
}
VSCodeの設定について↓

Vite設定用ファイル作成
Vite設定する場合、プロジェクト直下にvite.config.jsを作成します。
設定は下記のように記述します↓
import { defineConfig } from "vite"; // node_modules/vite/index.cjsのdefineConfigの内容を上書きする?

export default defineConfig({
  //ここに設定を追加
 })
import {defineConfig} のカーリーブラケット(波括弧)は分割代入を表しています。
ファイル構成
ファイル構成を下記画像のように変更しました↓
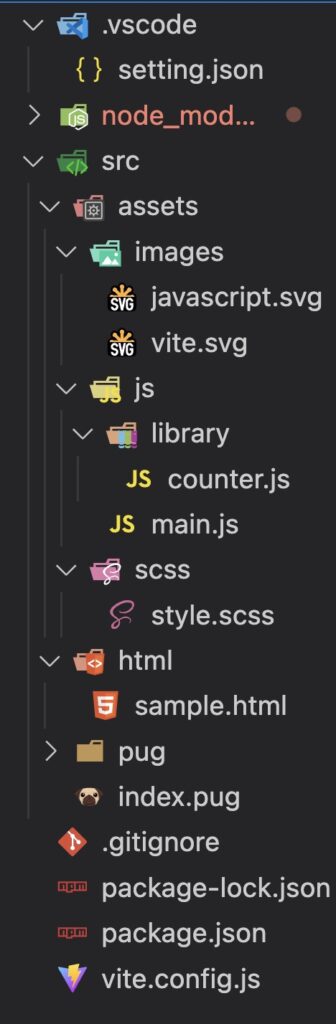
sccsフォルダやpugフォルダなど中身を省略しています。
完全なファイル構成は下記から確認できます↓
vite設定
ファイル構成の変更に伴い、Viteのデフォルト設定を上書きします。
root設定
index.html(今回は、index.pug)が置かれているパスを変更します。
パスは、現在作業中のディレクトリから見たindex.pugまでの相対パスで指定できます。
現在作業中のディレクトリは、pwdコマンドで確認できます。
srcフォルダ直下にindex.pugを置いたため、rootに"src"と記述します↓
import { defineConfig } from "vite";

export default defineConfig({
  root: "src"
})
root設定について↓
ビルド設定
npm run build実行時に生成されるdistフォルダの出力先を指定します↓
import { defineConfig } from "vite";

export default defineConfig({
  root: "src",
  build: {
    outDir:"../dist", //プロジェクトルートからの相対パス(index.pugからの相対パス)
    emptyOutDir: true,
   }
})outDirはdistフォルダをどこに出力するかをプロジェクトルートからの相対パスで指定します。
今回の場合は、index.pugからの相対パスを指定します。
emptyOutDir:trueは、ビルド時の警告を防ぐために記述しました↓
(!) outDir /Users/ユーザ名/Desktop/vite-study/dist is not inside project root and will not be emptied.
Use --emptyOutDir to override.Rollup設定
ViteはバンドルツールにRollupを使用しています。
そのため、Vite側でRollupに設定を渡すことができます↓
import { defineConfig } from "vite";

export default defineConfig({
  root: "src",
  build: {
    outDir:"../dist",
    emptyOutDir: true,
    rollupOptions: {
      //ここに設定を追加していく
    }
  }
})
入力設定
バンドルのエントリーポイントをinputに指定します↓
import { defineConfig } from "vite";

export default defineConfig({
  root: "src",
  build: {
    outDir:"../dist",
    emptyOutDir: true,
    rollupOptions: {
      input:"src/index.pug"
    }
  }
})複数のファイルをエントリーポイントに追加する場合、配列形式またはオブジェクト形式で書いて設定できます↓
import { defineConfig } from "vite";

export default defineConfig({
  root: "src",
  build: {
    outDir:"../dist",
    emptyOutDir: true,
    rollupOptions: {
      input:[
     // 配列形式
         "src/index.pug",
         "src/about/about.pug"
      ]
      //またはオブジェクト形式
   {
       main:"src/index.pug",
       about:"src/about/about.pug"
     }
    }
  }
})手動で追加していくのは手間だと思うのでglobule等のパッケージを使うと良いかもしれません。
inputの詳しい解説はこちら↓
出力設定
ビルド時に生成されるdistフォルダ内の構成を下記画像のようにします↓
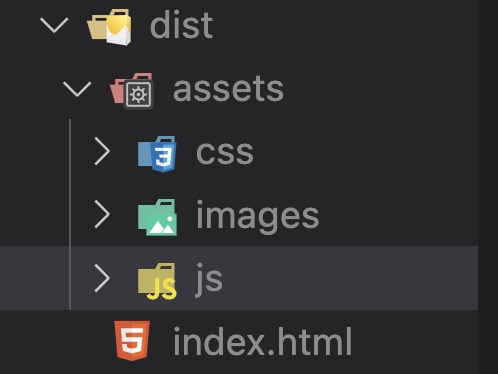
outputに設定を追加します↓
import { defineConfig } from "vite";

export default defineConfig({
  root: "src",
  build: {
    outDir:"../dist",
    emptyOutDir: true,
    rollupOptions: {
      input:"src/index.pug",
      output: {
        entryFileNames: `assets/js/[name].js`,
        chunkFileNames: `assets/js/[name].js`,
        assetFileNames: (assetInfo) => {
          if (/\.( gif|jpeg|jpg|png|svg|webp| )$/.test(assetInfo.name)) {
            return 'assets/images/[name].[ext]';
          }
          if (/\.css$/.test(assetInfo.name)) {
            return 'assets/css/[name].[ext]';
          }
          return 'assets/[name].[ext]';
        }
       }
     }
    }
  }
})- entryFileNames
- chunkFileNames
上記二つの[name]の値は、inputの書き方が関係します↓
- 文字列または配列形式→拡張子を除くファイル名が[name]の値
- オブジェクト形式→キー名が[name]の値
例えば「input:"src/index.pug"」とすると、indexが[name]の値になり、
「input:{unko:"src/index.pug"}」とすれば、unkoが[name]の値になります。
entryFileNamesについて↓
chunkFileNamesについて↓
chunkについて↓

24行目のassetFileNamesは、出力時のファイル構成を指定するために記述しました。
assetInfoは、distフォルダにファイルを出力する直前に渡される引数だと認識しています。
ファイル名などの情報がオブジェクト形式で渡されます。
assetInfoの中身はこちらをご確認ください↓
25行目から31行目にかけて、正規表現でファイルを振り分けています。
文字列の最後が「.gif」であれば、「assets/images/ファイル名.gif」に出力され、「.css」であれば、「asset/css/ファイル名.css」に出力されます。
assetInfo.nameは拡張子を含むファイル名を表します。[name]は拡張子を除くファイル名を表します。[ext]はドットなしのファイル拡張子を表します。
正規表現のサンプルについて↓
assetFileNamesについて↓
testメソッドについて↓
HTML設定
PugとMarkuplintの設定を行います。
Pug導入
@macropygia/vite-plugin-pug-staticをインストールします↓
npm i -D @macropygia/vite-plugin-pug-staticvite.config.jsにプラグインの設定を追加します↓
import { defineConfig } from "vite";
import vitePluginPugStatic from "@macropygia/vite-plugin-pug-static";

export default defineConfig({
  //root設定やbuild設定のコード省略
  plugins: [
    vitePluginPugStatic({
      buildOptions: { basedir: "src" },//ルートディレクトリ
      serveOptions: { basedir: "src" }//ルートディレクトリ
    })
  ]
})pluginsにプラグインの設定を追加します。「plugin」ではなく「plugins」です。僕はスペルミスに気づかず時間を浪費しました。
@macropygia/vite-plugin-pug-staticの詳細はこちらから↓

YENDさんの記事も勉強になりました↓

Markuplint導入
マークアップ検証のためMarkuplintを設定していきます↓
npx markuplint --initコマンド上での質問に答えていくと、.markuplintrcファイルを作成してくれます↓
{
  "rules": {
    "doctype": "always",
    "deprecated-element": true,
    "use-list": false,
    "no-refer-to-non-existent-id": true,
    "attr-duplication": true,
    "disallowed-element": true,
    "require-datetime": true,
    "permitted-contents": true,
    "no-empty-palpable-content": false,
    "require-accessible-name": true,
    "placeholder-label-option": true,
    "deprecated-attr": true,
    "landmark-roles": false,
    "required-h1": true,
    "label-has-control": false,
    "id-duplication": true,
    "required-element": true,
    "invalid-attr": true,
    "wai-aria": true,
    "required-attr": true
  }
}
pugもMarkuplintでチェックできるようにパッケージを追加します↓
npm i -D @markuplint/pug-parser.markuplintrcに設定を追加します↓
{
  "rules": {
   //ルール省略
  },
  "parser":{
    ".(?:pug|jade)$": "@markuplint/pug-parser" //パッケージの適用
  }
}
そして、markuplintを実行するためのコマンドをpackage.jsonに設定します↓
{
  "name": "vite-study",
  "private": true,
  "version": "0.0.0",
  "type": "module",
  "scripts": {
    "html:lint":"markuplint \"src/**/{*.pug,*.html}\"",
    "lint":"npm run html:lint",
    "dev": "npm run lint && vite",
    "build": "npm run lint && vite build",
    "preview": "npm run lint && vite preview"
  },
  "devDependencies": {
    "@macropygia/vite-plugin-pug-static": "^0.0.18",
    "@markuplint/pug-parser": "^3.2.0",
    "globule": "^1.3.4",
    "markuplint": "^3.2.0",
    "vite": "^4.1.0"
  }
}
Markuplintについてはこちら↓

@markuplint/pug-parserについてはこちら↓
CSS設定
Sass導入
sassのパッケージをインストールします↓
npm i -D sassそしてindex.pugにlink要素を指定します↓
doctype html
html(lang="ja")
  head
    meta(charset="UTF-8")
    meta(http-equiv="X-UA-Compatible", content="IE=edge")
    meta(name="viewport", content="width=device-width, initial-scale=1.0")
    title Document
    link(rel="stylesheet", href="/assets/scss/common.scss")
  body
h1 Vite StudyViteでCSSプリプロセッサの取り扱いについて↓
PostCSS設定
- CSSプロパティ並び順→css-declaration-sorter
- 自動ベンダープレフィックス付与→autoprefixer
- モバイルファーストに変換→postcss-sort-media-queries
上記3つをpostcss.config.cjsに追加していきます。
対象パッケージをインストールします↓
npm i -D autoprefixer css-declaration-sorter postcss-sort-media-queriesViteではPostCSS本体は、最初からインストールされているので再度インストールする必要はないです。(node_modules/vite/package.jsonのdependencies)↓
postcss.config.cjsを作成してお好みで設定を追加します↓
module.exports = {
  plugins: [
    require("autoprefixer")(),
    require("css-declaration-sorter")({
      order: "smacss", // alphabetical/ smacss / concentric-css
    }),
    require("postcss-sort-media-queries")({
      sort: 'mobile-first'
    }),
  ],
};ちなみに設定ファイル名を「postcss.cofig.js」にすると以下のエラーが出ます↓
module is not defined in ES module scope
This file is being treated as an ES module because it has a '.js' file extension
and '/Users/ユーザ名/Desktop/vite-study/package.json' contains "type": "module".
To treat it as a CommonJS script, rename it to use the '.cjs' file extension.package.jsonのtypeが"module"となっている場合、package.jsonがあるディレクトリ以下のjsファイルのモジュールシステムをESモジュールに固定されます。module.exportsやrequire()の機能はCommonJSに定義されていますが、ESモジュールには定義されていないので上記エラーが発生します。(解釈間違っているかもです。)
そのため、postcss.config.jsの拡張子をcjsに変換してCommonJSの機能を使用できるようにしています。
モジュールシステムについて↓
package.jsonの”type”について↓
Stylelint導入
CSSファイル検証用にStylelintを導入します。
stylelint本体とお好みのパッケージをインストールします↓
npm i -D stylelint stylelint-config-recommended-scss stylelint-config-property-sort-order-smacss stylelint-prettier stylelint-scss stylelint-order stylelint-config-prettierそいで、.stylelintrc.jsonを作成しルールを設定します↓
{
  "extends": [
    "stylelint-config-recommended-scss",
    "stylelint-config-property-sort-order-smacss",
    "stylelint-prettier/recommended"
  ],
  "plugins": ["stylelint-prettier", "stylelint-scss", "stylelint-order"],
  "ignoreFiles": ["**/node_modules/**"],
  "rules": {
    "prettier/prettier": true,
    "number-leading-zero": "always",
    "length-zero-no-unit": true,
    "unit-case": "lower",
    "color-hex-case": "lower",
    "color-hex-length": "short",
    "font-family-name-quotes": "always-where-recommended",
    "string-quotes": "double",
    "shorthand-property-no-redundant-values": true,
    "value-keyword-case": "lower",
    "property-case": "lower",
    "scss/operator-no-unspaced": null
  }
}
そしてpackage.jsonのscriptsにstylelintコマンドを追加します↓
 "scripts": {
    "html:lint": "markuplint \"src/**/{*.pug,*.html}\"",
    "style:lint": "stylelint \"src/**/*.scss\"",
    "lint": "npm run html:lint && npm run style:lint -- --fix",
    "dev": "npm run lint && vite",
    "build": "npm run lint && vite build",
    "preview": "npm run lint && vite preview"
  },
fixオプションは発生した問題を可能な限りで自動で修正するために記述しました。
Stylelintの公式サイトはこちら↓
JavaScript設定
script要素にtype=”module”を追加
script要素にtype=”module”を追加します↓
doctype html
html(lang="ja")
  head
    meta(charset="UTF-8")
    meta(http-equiv="X-UA-Compatible", content="IE=edge")
    meta(name="viewport", content="width=device-width, initial-scale=1.0")
    title Document
    link(rel="stylesheet", href="/assets/scss/common.scss")
    script(src="/assets/js/main.js" type="module")
  body
    h1 Vite Study
type=”module”は、defer属性を付けなくても遅延実行されます。
詳しくは下記2つを参照してください↓

ESLint導入
JavaScriptファイル検証用にESLintを導入します。
eslint本体とお好みのパッケージを追加します↓
npm i -D eslint eslint-config-prettier eslint-plugin-prettier.eslintrc.jsonを作成してお好みでルールを設定します↓
{
  "env": {
    "browser": true,
    "jquery": true,
    "node": true,
    "es6": true,
    "es2021": true
  },
  "extends": [
    "eslint:recommended",
    "plugin:prettier/recommended"
  ],
  "plugins": [
    "prettier"
  ],
  "parserOptions": {
    "ecmaVersion": "latest",
    "sourceType": "module"
  },
  "rules": {
    "semi": [
      "error",
      "always",
      {
        "omitLastInOneLineBlock": true
      }
    ],
    "prettier/prettier": "error",
    "no-extra-semi": "warn",
    "no-undef": "warn",
    "space-before-blocks": [
      "warn",
      {
        "functions": "always"
      }
    ]
  }
}.eslintignoreを作成して除外設定しておきます↓
/public/wp-content/languages/**
/public/wp-content/plugins/**
/public/wp-content/upgrade/**

/public/wp-content/themes/twentynineteen/**
/public/wp-content/themes/twentyseventeen/**
/public/wp-content/themes/twentysixteen/**
/public/wp-content/themes/twentytwenty/**
/public/wp-content/themes/twentytwentyone/**そしてpackage.jsonのscriptsにeslintコマンドを追加します↓
  "scripts": {
    "html:lint": "markuplint \"src/**/{*.pug,*.html}\"",
    "style:lint": "stylelint \"src/**/*.scss\"",
    "es:lint":"eslint \"src/**/*.js\"",
    "lint": "npm run html:lint && npm run style:lint -- --fix && npm run es:lint -- --fix",
    "dev": "npm run lint && vite",
    "build": "npm run lint && vite build",
    "preview": "npm run lint && vite preview"
  },
ESLint公式サイトはこちら↓
プラグインを使ってeslintを動作させる方法もあります↓
npm i -D @nabla/vite-plugin-eslintvite.config.jsのpluginsに追加します↓
import { defineConfig } from "vite";
import eslint from '@nabla/vite-plugin-eslint';

export default defineConfig({
  //他の記述省略
  plugins: [
    vitePluginPugStatic({
      buildOptions: { basedir: "src" },//ルートディレクトリ
      serveOptions: { basedir: "src" }//ルートディレクトリ
    }),
     eslint({
    eslintOptions: {
        fix: true,
      }
   }),
  ]
})
プラグインを使う場合、package.jsonに書いたes:lintコマンドの記述は削除しても大丈夫です。(多分…)
@nabla/vite-plugin-eslintのサイトはこちら↓
まとめ
Viteの設定はWebpackより簡単にできました。
またデプロイや画像の設定ができたら記事にしたいと思います。
今回作成した環境はGitHubに公開しています↓